With Enlightenment Theme you can customize the layout for every post archive, taxonomy and individual posts. Choose from a full width layout, a layout with a right or left sidebar or centered content with sidebars on both sides. Read the following tutorial to learn how you can customize the layout of any page on your website:
This tutorial is part of the series “Enlightenment Theme Documentation“. Enlightenment is a powerful theme that can help you create advanced page layouts for your website, but may require a bit of mastering for beginners. Make sure to read all of the theme’s documentation tutorials to get the most out of this theme.
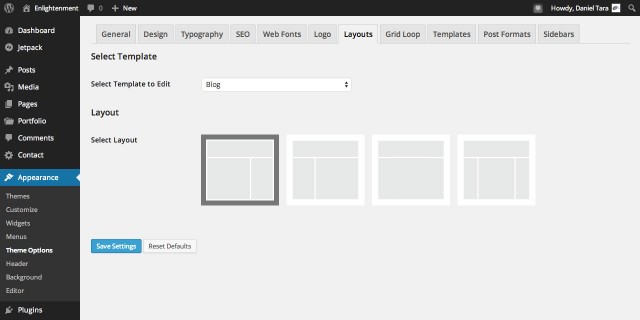
The setting for customizing the layout can be found under “Appearance > Theme Options > Layout”:
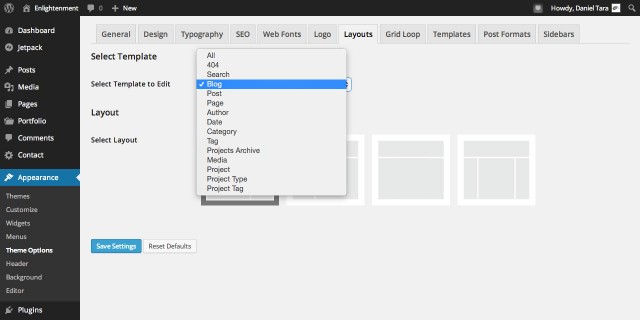
From the “Select Template to Edit” drop-down menu you can select the template to which you wish to customize its layout. As seen in the screenshot below, the drop-down displays all post type archives, publicly queryable posts, taxonomies and special templates like search and 404 pages:
The default posts archive is listed as “Blog” to avoid confusion in case you’re using a custom front page and you can also observe Jetpack’s portfolio custom post type listed as “Projects Archive”. Taxonomies include the default Category, Tag, Author and Date archives and Jetpack’s Project Type and Project Tag. The list is not exhaustive as any custom post type or taxonomy registered by plugins will automatically be added to the list. The layout of single post types can also be customized and individual posts have the option to override the default layout with their own setting; more on this later.
The images under “Select Layout” represent the available layouts. You can see these layouts in action in the theme demo:
- Content with right sidebar
- Content with left sidebar
- Full-width content
- Centered content with left and right sidebars
Overriding the Layout for all Templates
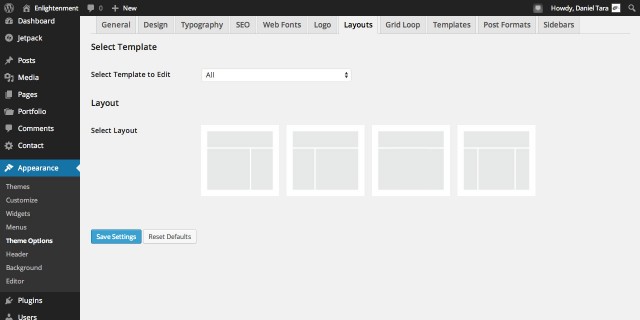
A special-case-scenario is the “All” option under “Select Template to Edit”. This selection allows you to override the layout for all archives, posts and taxonomies at once. The custom layout selected for individual posts will not be affected by this setting.
When overriding all templates you won’t see any visual feedback on the layout images and this setting will always appear as blank:
This is because there isn’t an internal setting for all templates. Instead the setting for each template will be overridden one time and then you can further customize the layout for each template.
Customizing the Layout of individual Posts
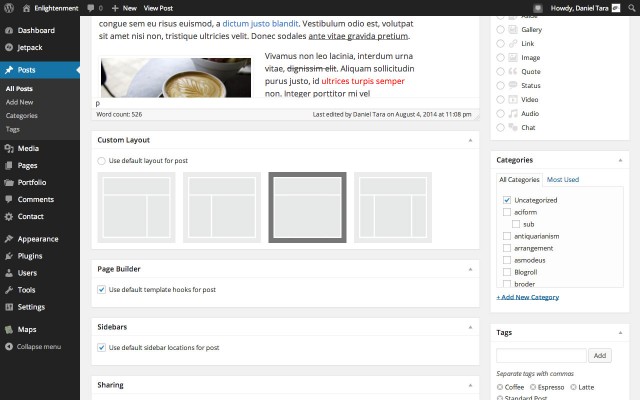
Besides the option to select the general layout for all posts that are publicly queryable, you have the option to select a custom layout for each individual post. When editing a post, below the post editor you can find a meta box titled “Custom Layout” from where you can select the preferred layout and that setting will be used for that particular post instead of the one specified in theme options:
This setting is available for all custom post types including pages and attachments. It’s particularly useful if you’re building custom landing pages as it helps make them stand out from other posts and pages. For example you may want to use the full-width layout on landing pages to avoid distracting visitor’s attention with sidebar content.
Conclusion
Pretty streamline, right? Customizing the layout should be simple and intuitive and we’ve given our best to make it so but maybe we missed something so please let us know in the comments if you have any ideas how the layout editing experience can be improved. Remember to also read the other tutorials from Enlightenment Theme’s documentation to get the most out of this theme.


