The Template Editor is a drag-and-drop tool that allows you to add and remove hooked functions from the theme’s templates without the need to modify them. You can customize any archive and post format and it integrates with the theme’s Grid Loop so you can select different settings for teaser posts.
This tutorial is part of the series “Enlightenment Theme Documentation“. Enlightenment is a powerful theme that can help you create advanced page layouts for your website, but may require a bit of mastering for beginners. Make sure to read all of the theme’s documentation tutorials to get the most out of this theme.
Drag-and-drop editing of templates has been a long established and popular feature in WordPress themes. Allowing backend customizations of a template’s output without editing code in template files if of great help to more non-technical users and also allows customizations that are future-proof, without the risk of losing them when updating and also remove some of the burden of creating child themes.
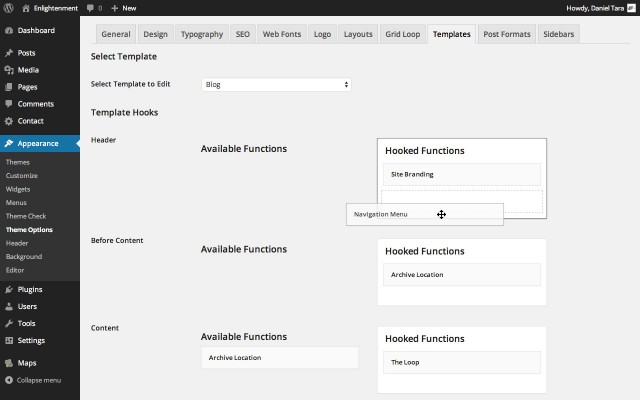
The Template Editor can be found under “Appearance > Theme Options > Templates”:
Post Formats can also be edited from the “Post Formats” tab. We’ll get into more detail about that later in the article.
The Template Editor has been designed similarly to WordPress’ Widgets interface. This is intended both to offer a more familiar experience to end-users and also to offer a smoother integration with the WordPress Admin interface.
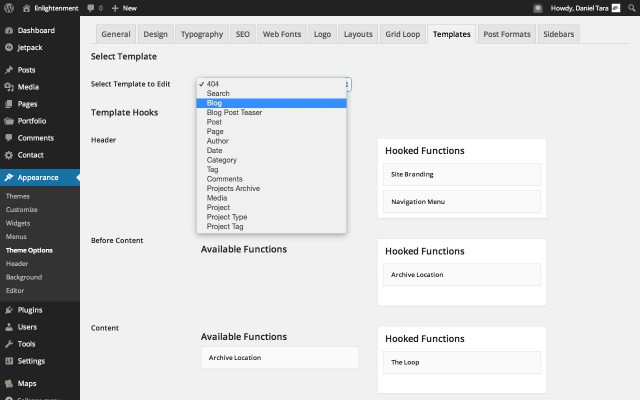
From the option “Select Template to Edit” you can select the template where you want to add or remove functions. In this list you can find the default WordPress post archive labeled “Blog”, all custom post type archives, the default WordPress Category and Tag taxonomies as well as any other registered custom taxonomies and all single post templates and their corresponding teasers:
In the screenshot you can see Jetpack’s Portfolio “Project” post type and the “Project Type” and “Project Tag” custom taxonomies. The template for attachments is titled “Media” and a special template is the “Comments” that doesn’t display the general template hooks but special hooks available in the comments template.
Breakdown of the Theme’s internal Hook System
Each template has a list of available hooks to which functions can be added or removed. This hooks correspond to fixed sections inside the template like header or post content. The functions that can be added to each hook depend on a some conditionals, that’s why only a limited number of functions is available for each hook. For example the site header can only support site branding and navigation while the entry header can support post title, post thumbnail and post meta.
The available functions are listed in the left-hand column and the already hooked functions in the right-hand column. They can be added or removed by dragging and dropping them from one column to the other. For internal reason a function can be added to a hook only once.
The theme’s internal hook system has been designed on several levels: The first level covers general template sections like header, main content and footer. The second level covers sections inside The Loop that depend on conditionals to display their content. The third level covers sections inside post entries; these are hooks that loop several times for each displayed entry. Finally, the last level is comments section that usually displays on single posts with comments open.
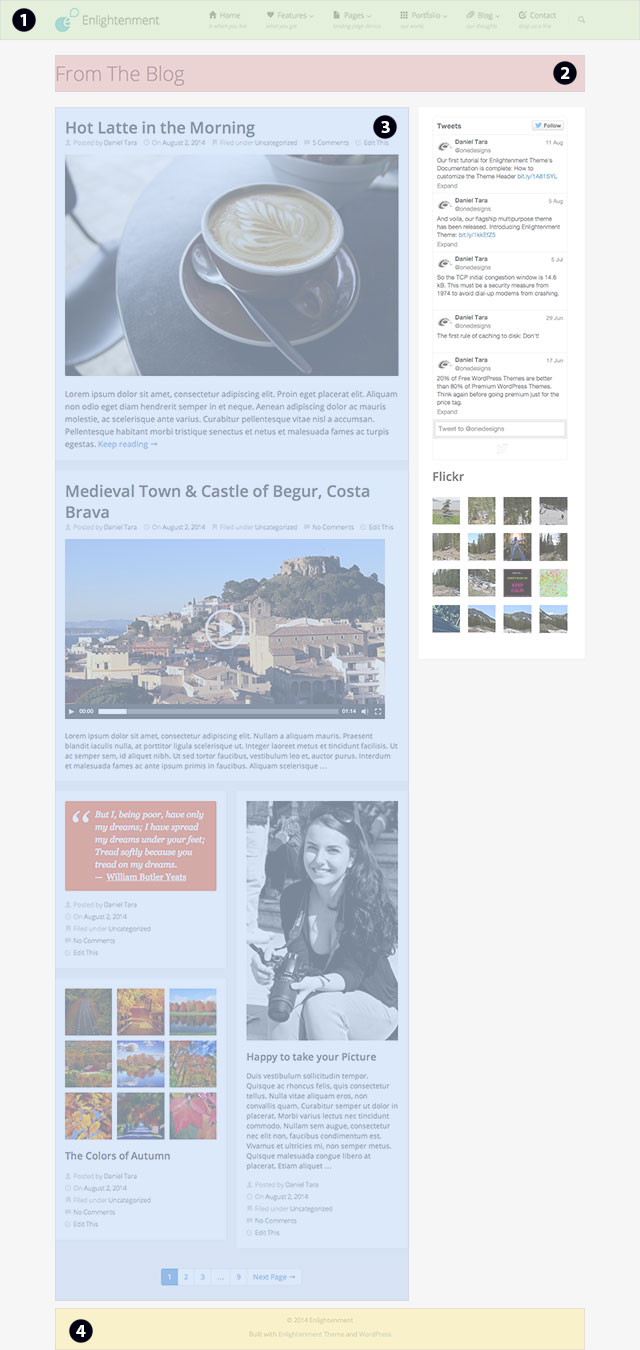
In the following we will describe in detail using color-coded screenshots each level of hooks and their corresponding locations in the Template Editor:
General Template Hooks
General template hooks cover the main sections of any template like header, main content area and footer. As you can see sidebars are outside the scope of the template editor as their customization is handled by the unlimited sidebars feature.
- Header
- Before Content
- Content
- Footer
The Loop Template Hooks
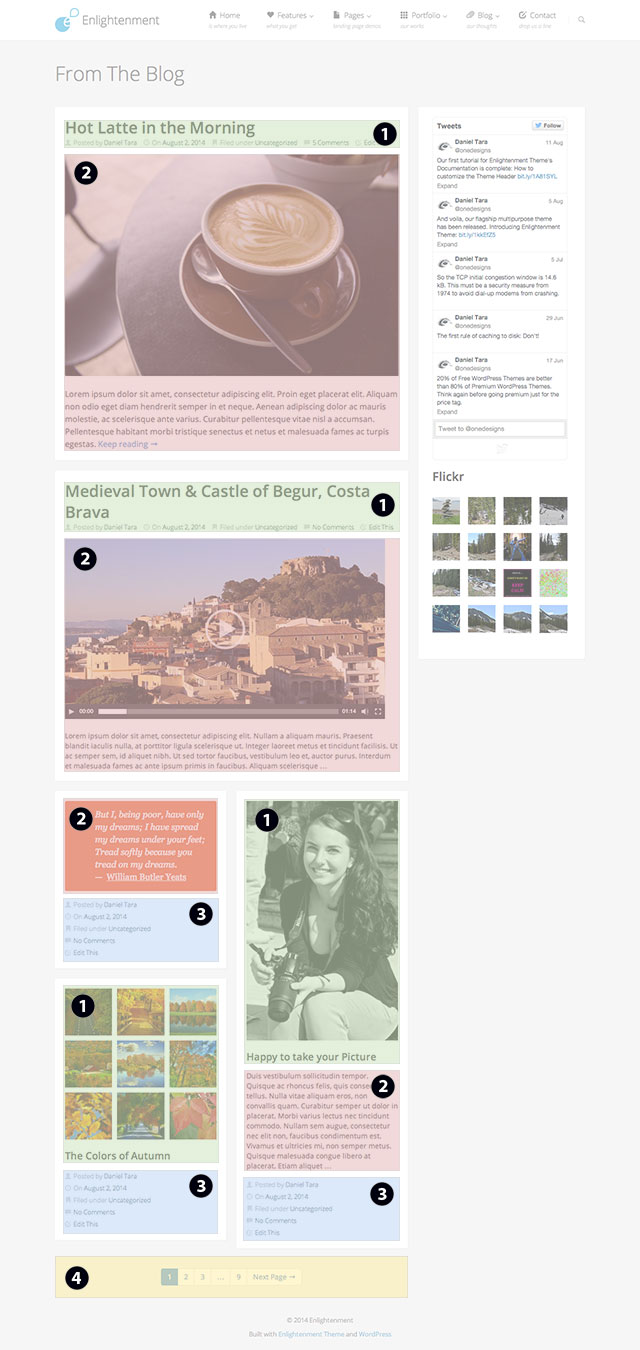
Template hooks inside The Loop refer to hooks whose functions are more dependent on the template being queried. These functions decide how posts that are being looped are displayed. The Loop is by default located inside the content section highlighted in the screenshot above.
- Entry Header
- Entry Content
- Entry Footer
- After Entries List
Post Entry Template Hooks
Since post entries are located inside The Loop, template hooks inside post entries slightly intertwine with The Loop posts presented above. Post Entries template hooks are best highlighted on the single post template:
- Entry Header
- Entry Content
- Entry Footer
- After Entry Footer
Comments Template Hooks
Template hooks for comments are by default located inside the “After Entry Footer” hook highlighted above. There hooks are usually displayed in the single post template:
- Before Comments List
- Comments
- After Comments List
- After Comments
Template Editor for Post Formats
Since post formats are a special case that showcase content based on their format rather than the current template, their hooks can be edited from a different template editor designed specifically for post formats.
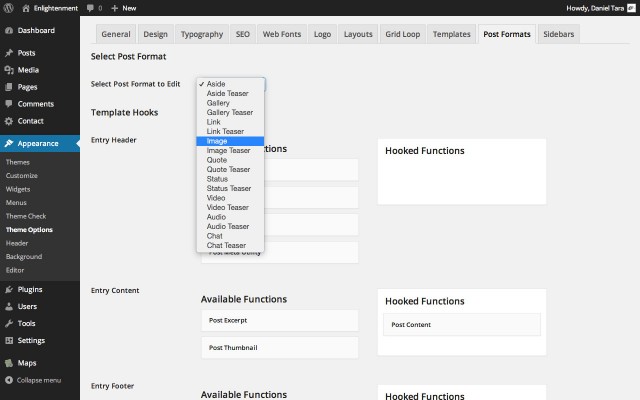
The template editor for post formats can be found under “Appearance > Theme Options > Post Formats”. Under “Select Post Format to Edit” you can find all post formats and their corresponding teasers. Any post that does not display as a leading post in the Grid Loop is called a teaser and content is rendered differently for such entries; for example they usually display the excerpt instead of content and show the post meta at the bottom.
Changed made in the post formats template editor only take effect on archive pages, not single posts. Since post formats are rendered inside The Loop, only the Entry Template Hooks are available for editing.
The Page Builder
You can customize the template for every individual post. This includes the default WordPress post type, pages, attachments and any registered custom post type. Any changes made inside the Page Builder override the settings in the Template Editor and are unique to that specific post. This is particularly useful when showcasing unique content in custom landing pages. For example you can remove the site navigation or post meta to avoid distracting the visitor’s attention. In combination with the Unlimited Sidebars feature this allows advanced customization of any page, an example being the theme’s demo front page.
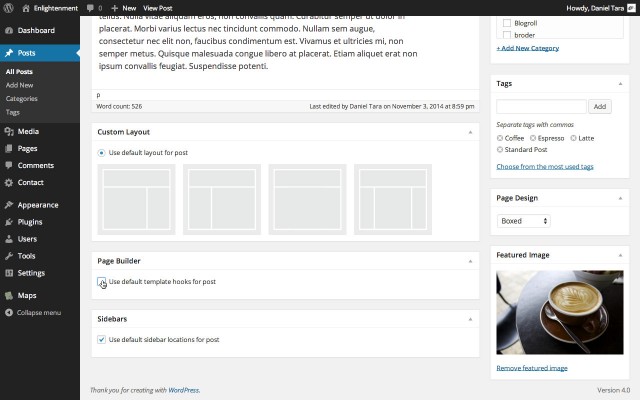
When editing a post, in the central column below the text editor you can find a meta box titled “Page Builder”. When the “Use default template hooks for post” option is checked the settings from the Template Editor for that post type will be used instead. To be able to edit the template’s hooks, first uncheck that box:
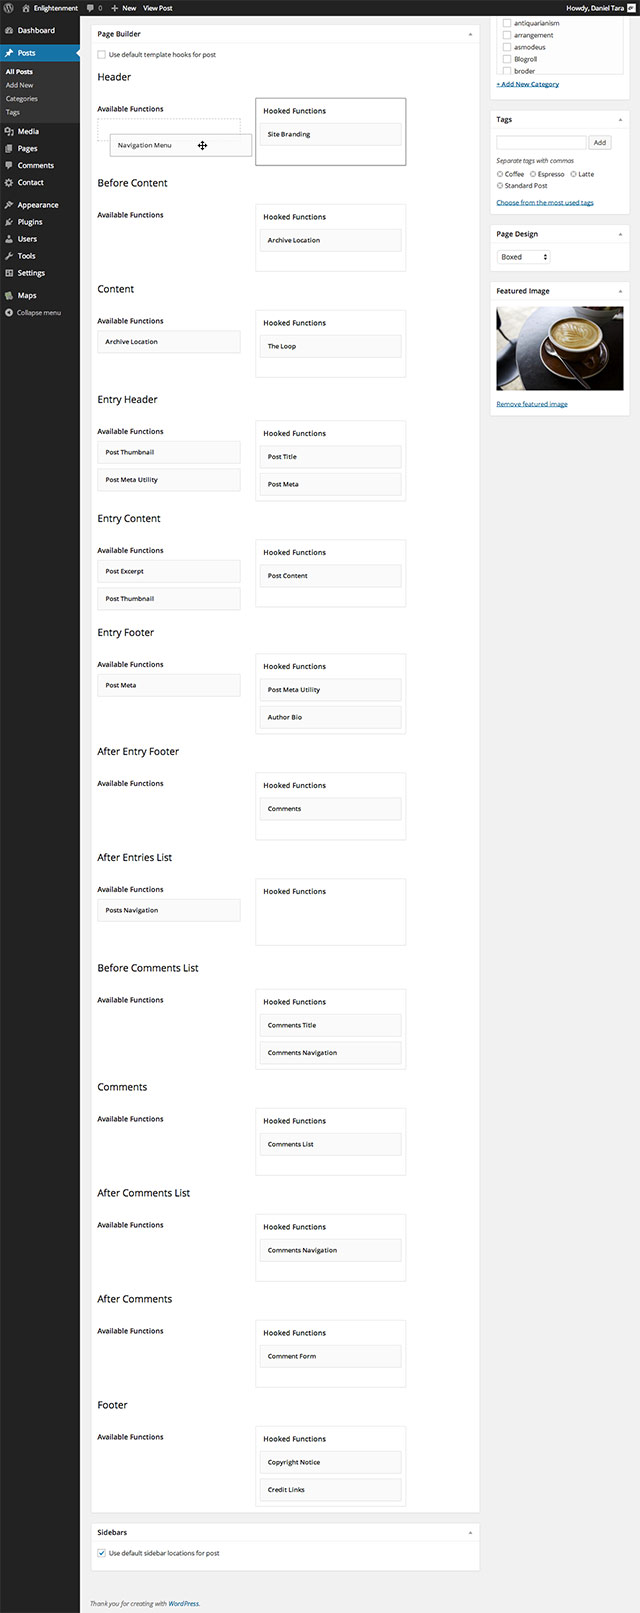
After the Page Builder has been activated, all hooks available for that post type template will appear and become editable:
Conclusion
We did it! A drag-and-drop template builder was a long-time goal for our themes. One of our users’ most common requests was the ability to edit templates without touching code and without losing changes on updates. Now we’ve been finally able to offer you this level of customization and flexibility.
Please leave us a comment letting us know how the template builder has helped you customize your website and any other feedback you may have regarding this feature. Don’t forget to read our other tutorials that cover Enlightenment Theme’s documentation to get the most out of this theme.


Just wanted to say thanks for giving such a beautifully created theme to us for free!
Great documentation is hard to find so that you for being so thorough with yours!
Cheers,
Gary