Traditionally websites powered by WordPress made use of one or more sidebars where you could add widgets and those sidebars would display in fixed locations and repeat themselves on all your website’s pages. Enlightenment Theme extends this functionality by allowing you to dynamically create an unlimited number of widget areas and assign them to sidebar locations belonging to different templates and individual posts.
This tutorial is part of the series “Enlightenment Theme Documentation“. Enlightenment is a powerful theme that can help you create advanced page layouts for your website, but may require a bit of mastering for beginners. Make sure to read all of the theme’s documentation tutorials to get the most out of this theme.
The unlimited sidebars feature is useful when you want to customize different pages on your website to show widgets directly related to the content displayed on that page rather than general widgets relating to all your website’s content.
The settings for unlimited sidebars is found under “Appearance > Theme Options > Sidebars”:

By default the theme creates 3 widget areas assigned to the Primary, Secondary and Navbar sidebars for all templates, all other sidebars remaining unused.
Creating New Widget Areas
New widget areas can be created from the “Add Dynamic Sidebar” option at the top of the page. Every widget area is associated with a unique name that you need to enter. This feature also integrates with the theme’s grid system so you may choose to display widgets in this sidebar to display in multiple columns:

All manually created sidebars will appear in the options page and can be edited or deleted at any time. When a sidebar is deleted all its assigned widgets will be lost:

The theme’s default sidebars can not be edited or deleted but can be unassigned from Sidebar Locations.
Assigning Widget Area to Sidebar Locations
Newly created widget areas will appear in the sidebars list under “Appearance > Widgets” and you will be able to add widgets to them but to make them appear on the front-end you will have to assign them a location. The theme contains several fixed locations for widget areas that are listed under “Sidebar Locations”. A detailed breakdown of the theme’s sidebar structure is covered in a separate article. Widget areas can be dynamically assigned to these locations for any template.
You can select the template where you want to add the widget area under “Select Template to Edit”:

After the template has been selected you can assign widget areas to any of the predefined locations:
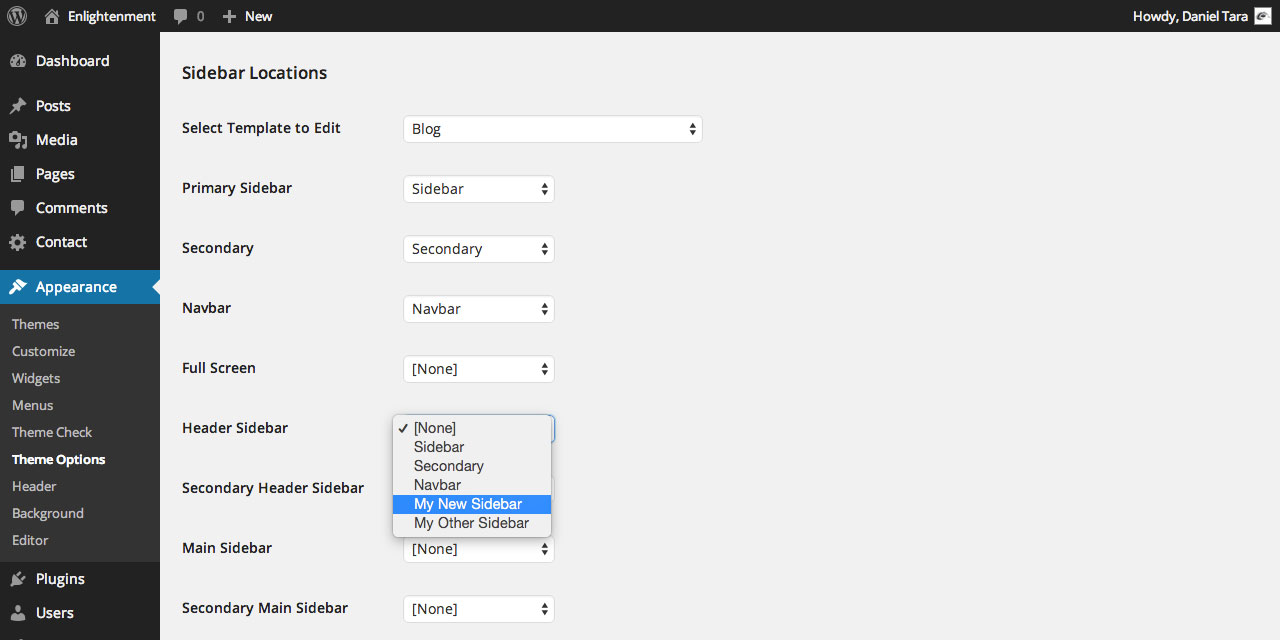
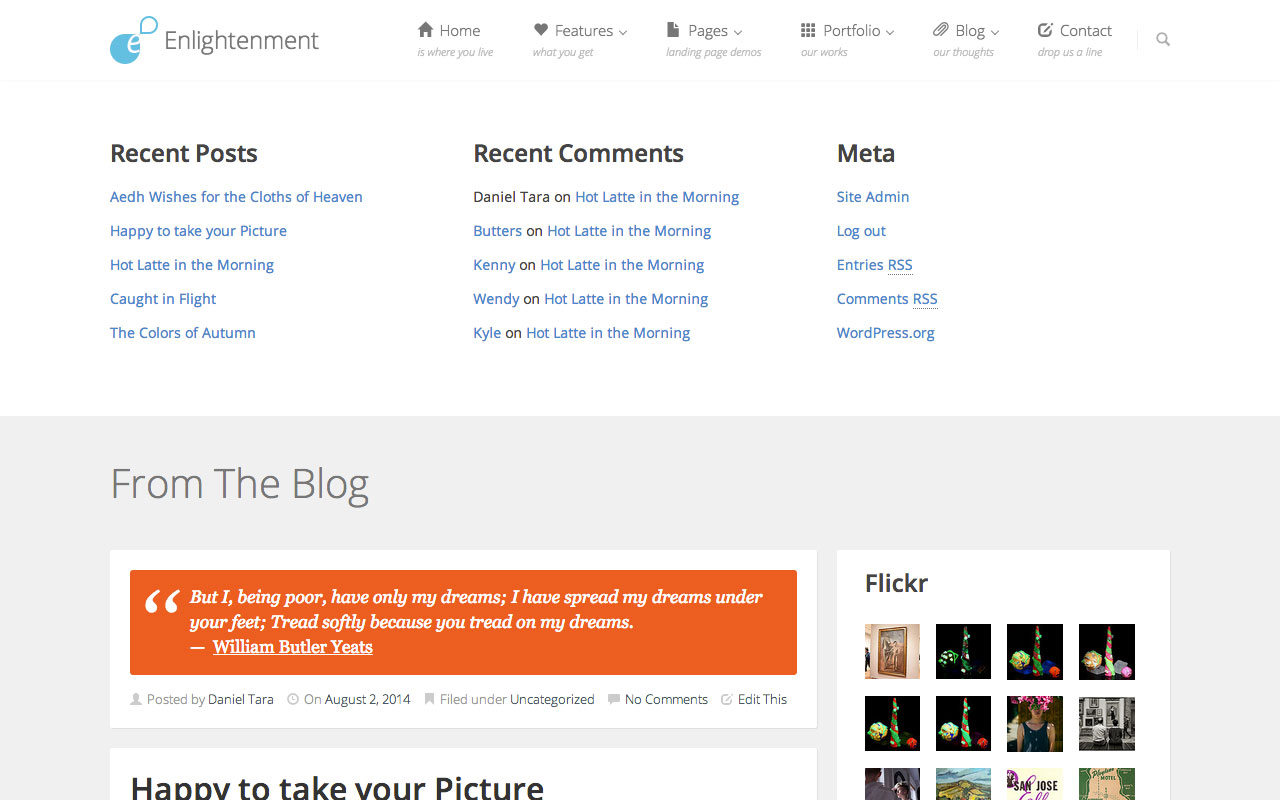
After the settings have been saved you can start adding widgets to your manually created sidebars:

These widgets will appear in the selected template in the assigned sidebar location. In our example above, widgets added to “My New Sidebar” will appear in the “Blog” template in the “Header” sidebar in 3 columns:
Overriding Sidebar Locations for individual Posts
In addition to dynamically customize widget areas for each template, you can override these settings for each individual post, including pages, attachments and any other custom post types. This is particularly useful when creating landing pages and you want to display content specifically related to that page no content in the sidebars at all.
When editing the post, in the central column under the post editor you can find a meta box titled “Sidebars”. The option “Use default sidebar locations for page” disables any overriding and uses the locations defined in “Theme Options” for that particular post type. To enable overriding first uncheck this option:

A list of all available sidebar locations will collapse. If the sidebars for this post have never been overridden, the settings from “Theme Options” are imported and you can assign the sidebars you want to display for this post:
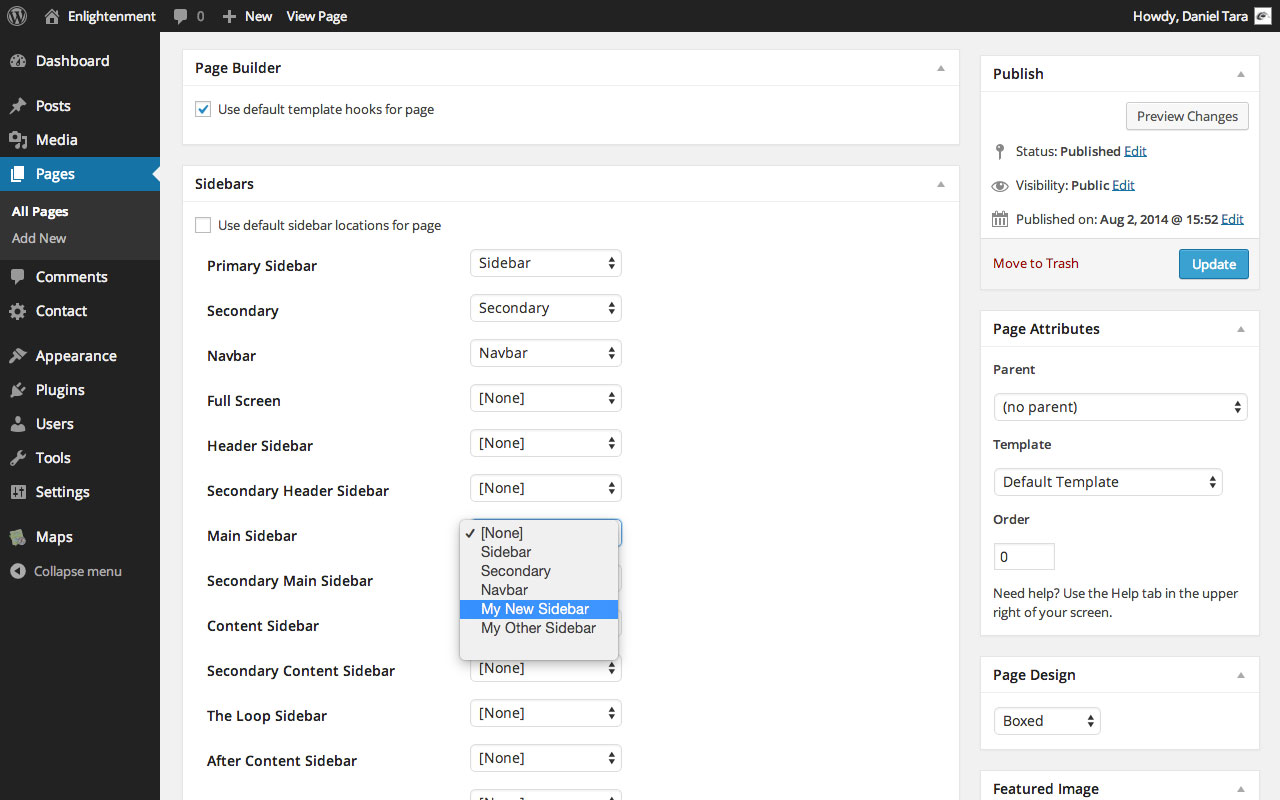
The options selected in a post’s meta box will only be applied to that specific post:

In the example above, the “My New Sidebar” widget area has been assigned to the “Footer Secondary” sidebar location.
Conclusion
To be able to select what sidebars appear appear and where is surely helpful when creating personalized reading experiences like landing pages or author profiles. Please let us know in the comments sections how you find our implementation of unlimited sidebars and what improvements we could bring to the process. Don’t forget to read our other tutorials from Enlightenment Theme’s documentation.
I clicked the Appearance > Theme Options > Sidebars but I didn’t find the button of “Add sidebar”, please help, many thanks!
There’s a screenshot in the tutorial under “Creating New Widget Areas” that shows the button’s location.
Hi
I’ve got the same problem. Under Appearance > Theme Options > Sidebars is no “ADD SIDEBAR” button. I don’t know why. Help me, because this theme is fantastic.
Such issues are usually caused by AdBlock extension.