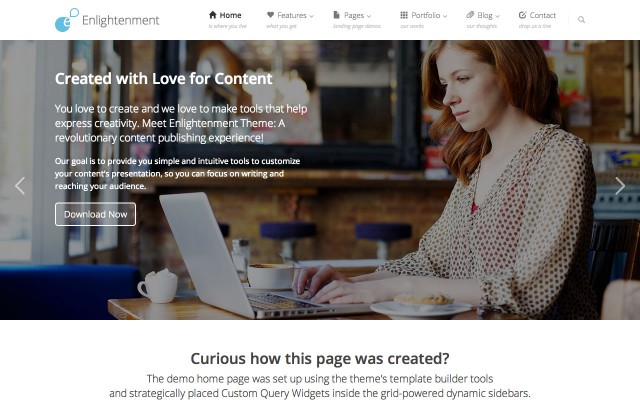
With Enlightenment Theme you can create advanced and flexible page layouts where you can showcase any type of content by using tools that go beyond the WordPress post editor. After we have documented the purpose and usage of the template builder tools it’s time to deconstruct a practical example of a custom built landing page. In this tutorial we will present a step-by-step breakdown how to recreate the Theme’s Demo Home Page.
This tutorial is part of the series “Enlightenment Theme Documentation”. Enlightenment is a powerful theme that can help you create advanced page layouts for your website, but may require a bit of mastering for beginners. Make sure to read all of the theme’s documentation tutorials to get the most out of this theme.
Overwiew of the Theme Demo Home Page Architecture
Enlightenment Theme’s demo home page is a static page set as front page with its content highly customized. The level of customization in this page is achieved adding and removing components with the Page Builder, adding Custom Query Widgets to user-assigned sidebar locations and integrating these components with the theme’s Grid System.
Visual Breakdown of the Home Page’s Components
Before we dive into details how each piece of content was created, we present you a color-coded breakdown of the home page’s components and their corresponding locations on the page. Page locations (mostly sidebars) are in a lighter color and numbered with a black bullet and components (mostly custom query widgets) are highlighted in a darker color and numbered with a white bullet:
- Navbar
- Site Logo and Title
- Site Navigation
- Navbar Sidebar: Search Widget
- Full Screen Sidebar, 1 Column
- Custom Query Widget: Slider, Multiple Pages
- Header Sidebar, 1 Column
- Custom Query Widget: Single Page
- Custom Query Widget: 3 Columns, Multiple Pages
- Secondary Header Sidebar, 1 Column
- Custom Query Widget: Single Page
- Main Sidebar, 1 Column
- Custom Query Widget: Single Page
- Secondary Main Sidebar, 1 Column
- Custom Query Widget: 3 Columns, Portfolio Post Type
- Content Sidebar, 1 Column
- Custom Query Widget: Single Page
- Secondary Content Sidebar, 1 Column
- Custom Query Widget: Single Page
- Page Content
- After Content Sidebar, 2 Columns
- Custom Query Widget: Single Page
- Custom Query Widget: Image Gallery, 1 leading post
- Secondary After Content Sidebar, 1 Column
- Custom Query Widget: Single Page
- After Main Sidebar, 1 Column
- Custom Query Widget: 4 Columns, Multiple Pages
- Secondary After Main Sidebar, 1 Column
- Custom Query Widget: 2 Columns, Multiple Pages
- Footer Sidebar, 1 Column
- Custom Query Widget: Carousel, Image Gallery
- Secondary Footer Sidebar, 4 Columns
- Recent Posts Widget
- Recent Comments Widget
- Recent Posts Widget
- Recent Comments Widget
Walkthrough of the Home Page Creation Process
In the following we will go into detail about how to create and configure the static front page and the content for each of the page’s components, how toset up the required sidebar locations and add the corresponding widgets.
Creating a New Page
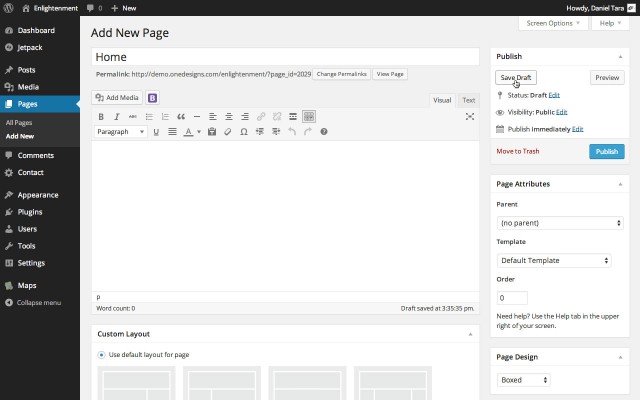
To create a new page go to Pages → Add New. You can give the page any title as we will remove the title from the page in the next step. The page title will still appear in the browser tab and search engine results unless you override it with a SEO plugin like WordPress SEO by Yoast or All-in-one SEO Pack. We’ll just call our page “Home”.
Adding Content to Page
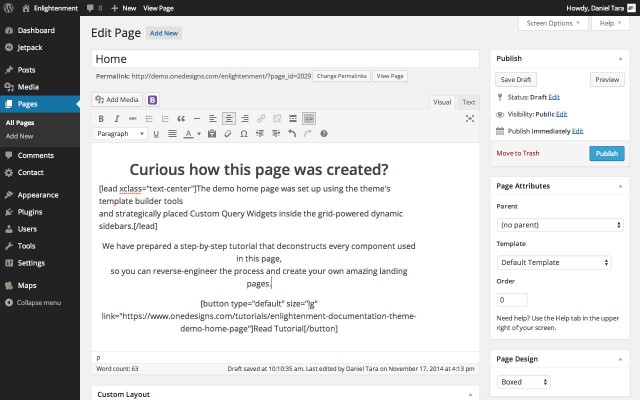
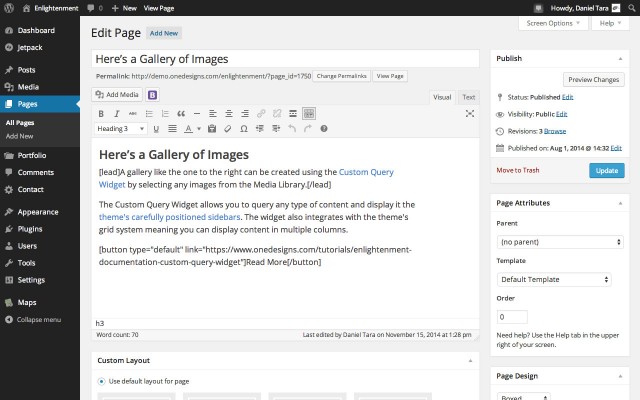
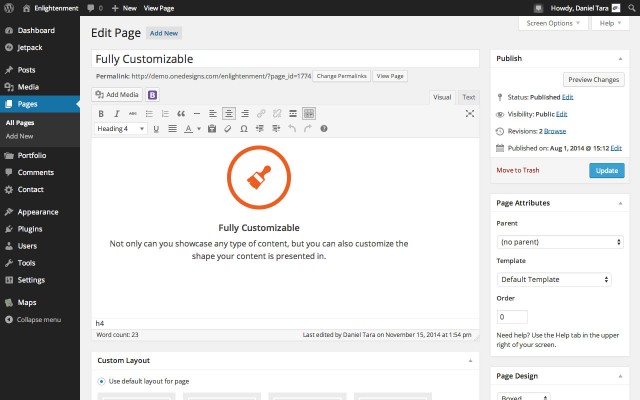
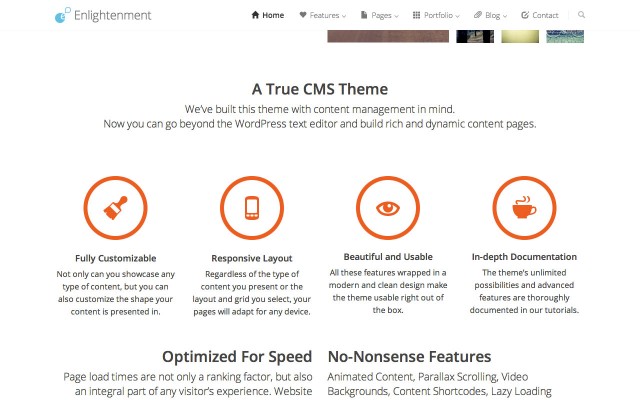
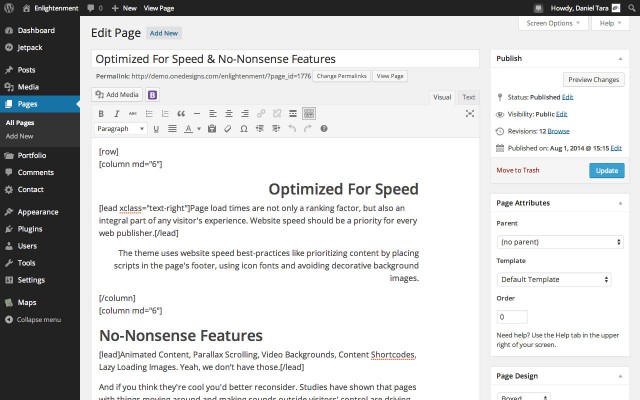
Besides content that is dynamically added via widget areas, content created via the WordPress text editor can also be displayed on the page or you can remove the page’s content via the Page Builder and generate the page exclusively through widget areas. Almost any piece of content can be added through the text editor and for consistency reasons we have selected a central page section so all available sidebars can be used:
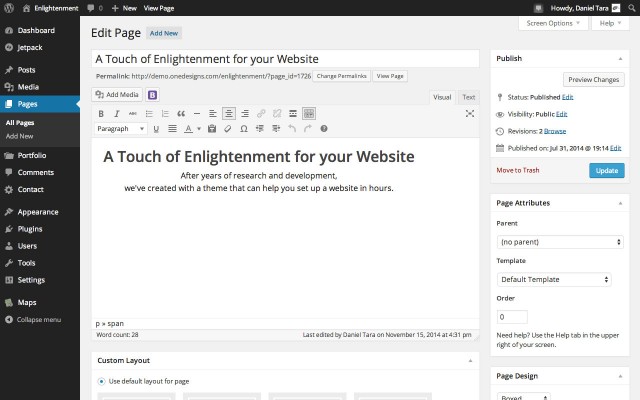
The content’s headline is styled as “Heading 3” and aligned to center via the editor.
The leading text is added via the Bootstrap Shortcodes for WordPress plugin and the [lead] shortcode. Since this shortcode generates a paragraph we can’t manipulate its styling via the editor, so to align the text to center we have added the xclass="text-center" attribute to the shortcode.
The non-paragraph line-breaks in the text can be inserted by pressing Shift+Enter.
The “Read More” button was added with the [button] shortcode. The type="default" styles it with a white background and size="lg" makes its text larger. The href="…" attribute is the link the button points to. Since this shortcode does not generate a paragraph it can be aligned to center from the text editor.
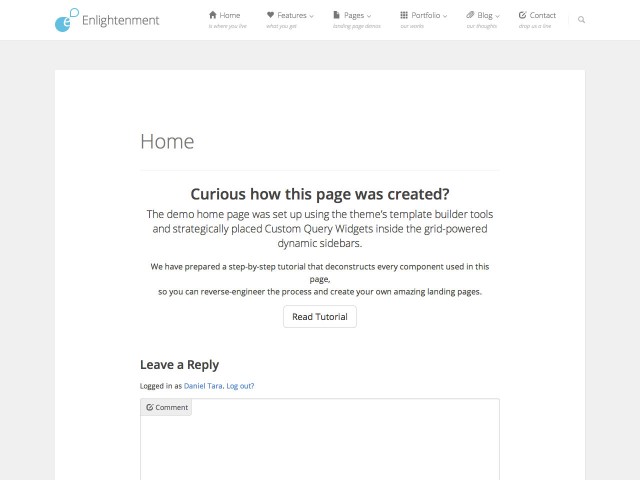
If your preview the page at this point, you will see the default page template with the added content and the comment form:
Configuring the Static Page
After you have saved the page as draft you can go ahead and apply page configurations. To give the page a more “landing page” look we will need to apply some customizations to its design.
Turning off Comments
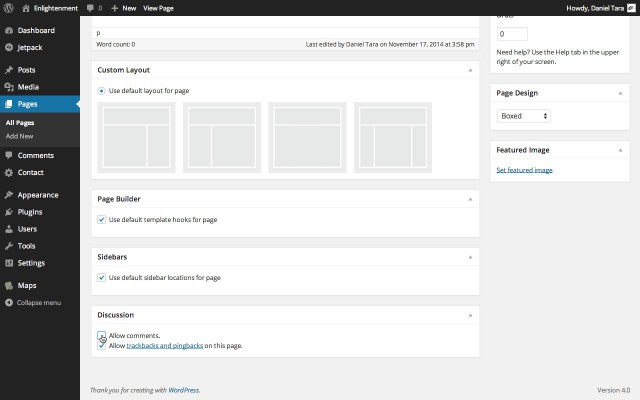
The first thing you’ll want to do is turn off comments for this page. You can do this by scrolling to the bottom of the page and in the “Discussion” meta box unchecking the “Allow comments” box. You may also want to uncheck “Allow Trackbacks” to avoid any trackbacks from appearing on the page. If you don’t see the “Discussion” meta box, click on “Screen Options” in the upper right-hand corner and check “Discussion”:
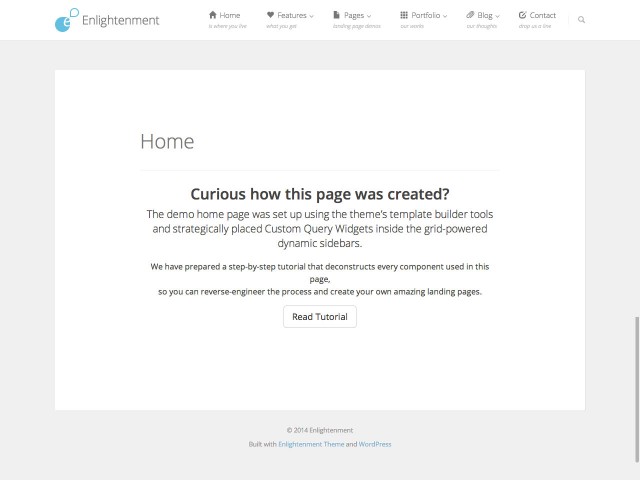
If you preview it now you’ll see the default page template without the comment form:
Changing the Page Design
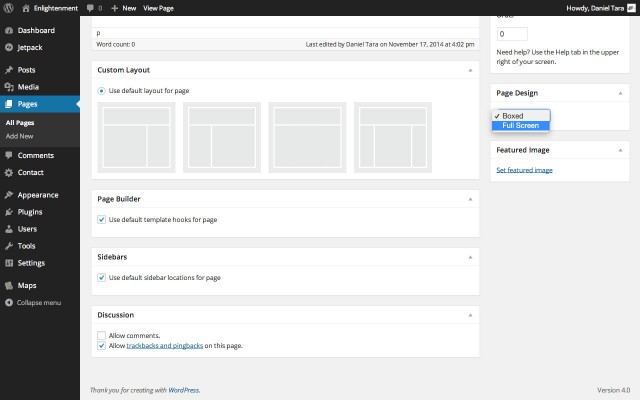
For the theme’s home page we’ll be using the “Full Screen” page design instead of the “Default” page design. To do this go to the “Page Design” meta box in the right-hand column and select “Full Screen”:
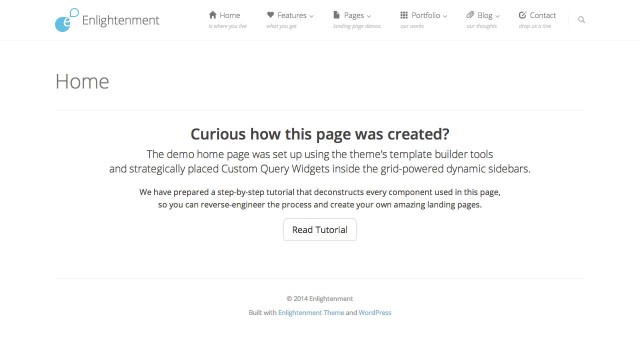
On preview you will see the page on a white background with no borders:
Removing the Page Title
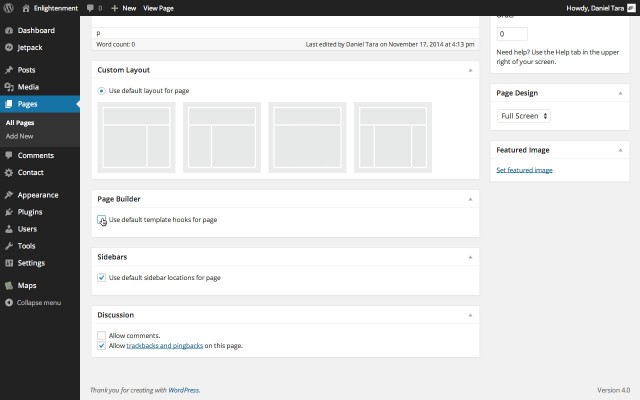
The page title can be removed via the Page Builder. Scroll to the bottom of the page and in the meta box “Page Builder” uncheck “Use default template hooks for page”. If you don’t see this meta box, click on “Screen Options” in the upper right-hand corner and check “Page Builder”:
Note that to be able to use the page builder tools you first need to save the page as draft.
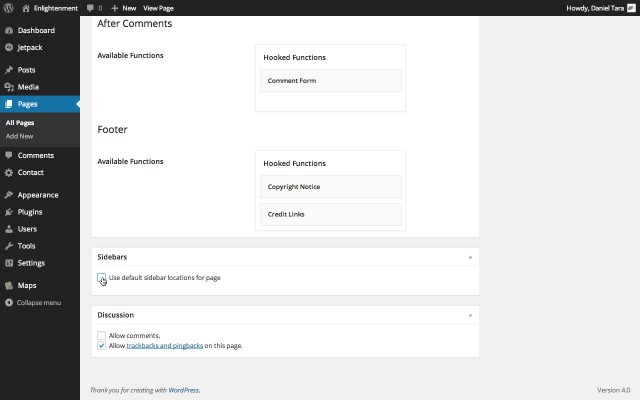
For the “Entry Header” hook drag the “Post Title” function from the “Hooked Functions” column to the “Available Functions” column:
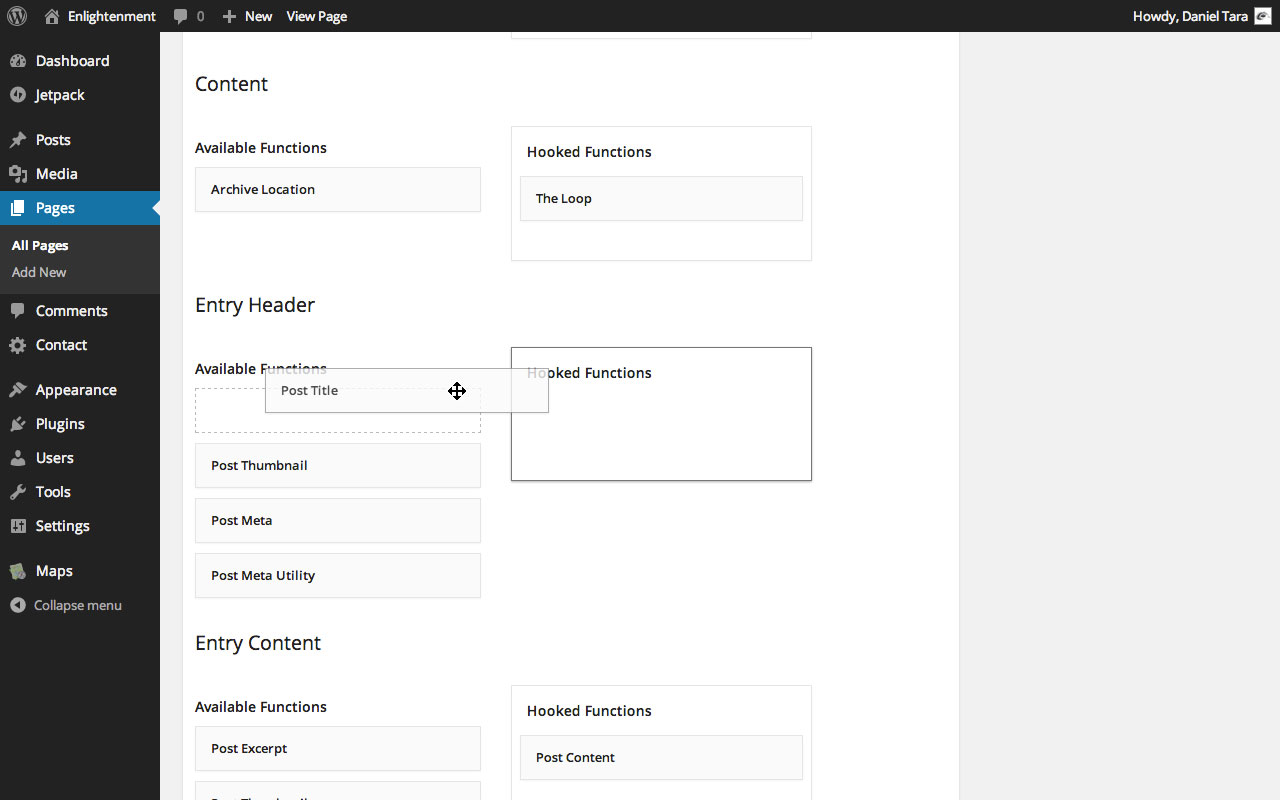
If you’re editing a post with a post type different than page you may also want to remove the “Post Meta”. If you didn’t add any content to the page you’ll want to remove “The Loop” function from the “Content” hook instead.
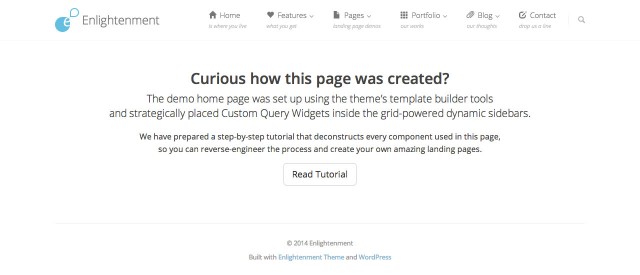
Now if you preview the page you’ll see just the page content without the title:
Great! It’s starting to look like a landing page canvas.
Changing the Page Layout
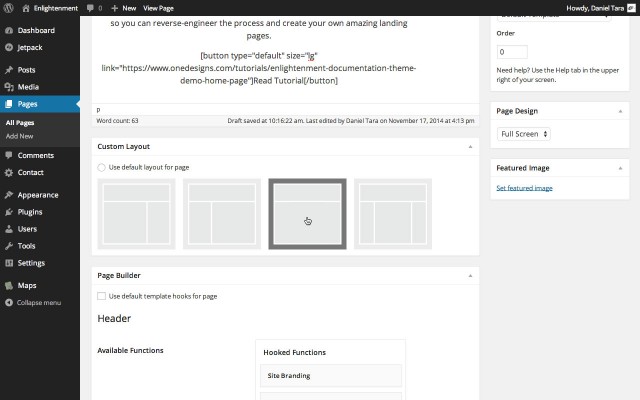
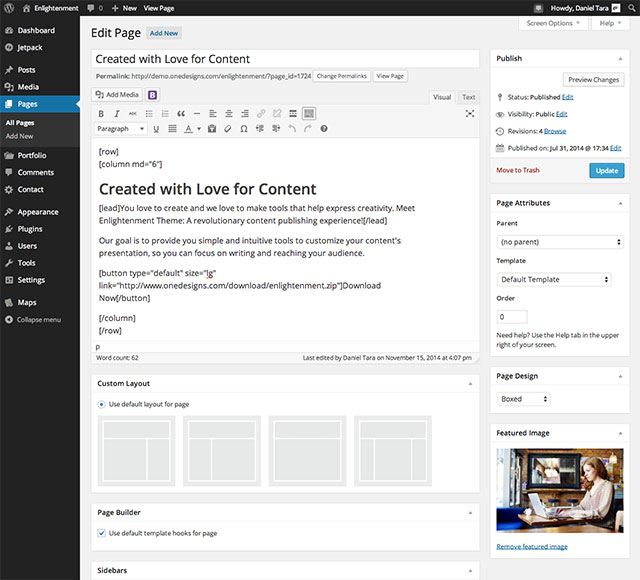
The layout can be changed from the “Page Layout” meta box under the post editor. For this page we’ll use the “Full Width” layout:
Since “Full Width” is the default layout for pages, changing it is merely a precautionary measure in care you’ll ever change the default layout for pages.
Now we can move further to the next step and configure the widget areas.
Creating Dynamic Sidebars
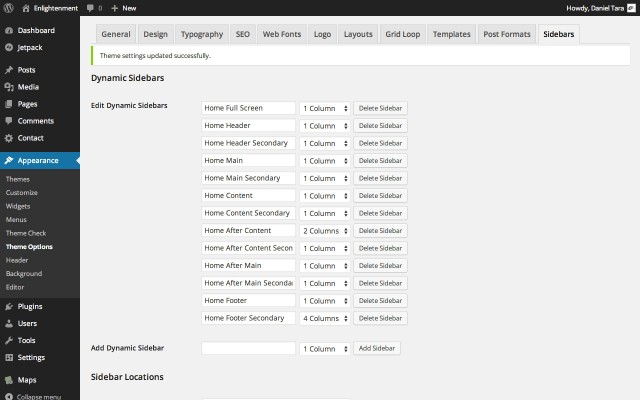
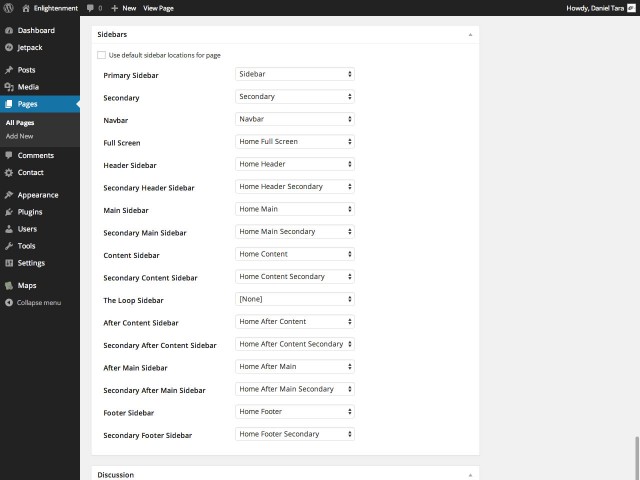
New sidebars can be created by going to Appearance → Theme Options → Sidebars. For this page we’ll be using every sidebar location except “Primary”, “Secondary”, “Navbar” and “The Loop”. To keep simple naming analogies we’ll name every sidebar like the location it corresponds to and prefix it with “Home”. So, the sidebars we’ll be creating and their number of columns are as follows:
| # | Sidebar Name | Columns |
|---|---|---|
| 1 | Home Full Screen | 1 Column |
| 2 | Home Header | 1 Column |
| 3 | Home Secondary Header | 1 Column |
| 4 | Home Main | 1 Column |
| 5 | Home Secondary Main | 1 Column |
| 6 | Home Content | 1 Column |
| 7 | Home Secondary Content | 1 Column |
| 8 | Home After Content | 2 Columns |
| 9 | Home Secondary After Content | 1 Column |
| 10 | Home After Main | 1 Column |
| 11 | Home Secondary After Main | 1 Column |
| 12 | Home Footer | 1 Column |
| 13 | Home Secondary Footer | 4 Columns |
After all sidebars have been created the list should look like this:
Don’t assign these sidebars to any sidebar locations in the global scope as we’ll use them exclusively for our home page.
Assigning Dynamic Sidebars to Sidebar Locations
Go back to the page editor and click on “Save Draft” to force a refresh of the page and make the newly created sidebars available. Then scroll to the bottom of the page and for the “Sidebars” meta box uncheck “Use default sidebar locations for page”. If you don’t see the “Sidebars” meta box, click on “Screen Options” in the upper right-hand corner and check “Sidebars”.
How you should see all sidebar locations and be able to assign the previously created dynamic sidebars to them:
Go ahead and save the page as draft now so you don’t have to come back here each time after adding a widget.
Generating Dynamic Page Components
Now that we’ve finished setting up the page, we can move further to generating the content components that will be added to it. For this part we’ll be creating some static pages that we’ll afterwards add to the page via Custom Query Widgets.
Since these pages will also be accessible from their own URL it’s a good idea to instruct search engines not to index those pages. This can be done with a plugin like WordPress SEO by going to the “Advanced” tab and setting “Meta Robots Index” to “noindex” and “Include in Sitemap” to “Never include”.
Generating the Full Screen Slider
The Full Screen Slider is a Custom Query Widget of multiple pages added to the “Full Screen” sidebar. The featured images will be used as the background and the pages’ content will overlay on the image.
Creating Content Pages
First we will create 3 pages and add the corresponding featured images to them. The pages are then displayed in reverse-chronological order so you’ll want to pay attention to the order in which they’re published. You can give the pages any title as it won’t be displayed on the page.
The content was made to occupy only half the width by inserting it in a 6 columns width with Bootstrap’s grid system. This is done by first wrapping in the [column md="6"] … [/column] shortcode and then wrapping the entire content in [row] … [/row] shortcodes that are required to wrap all grid columns.
The [button] shortcode with type="default" attributes renders as with a transparent background and white border in the slider.
Adding the Custom Query Widget
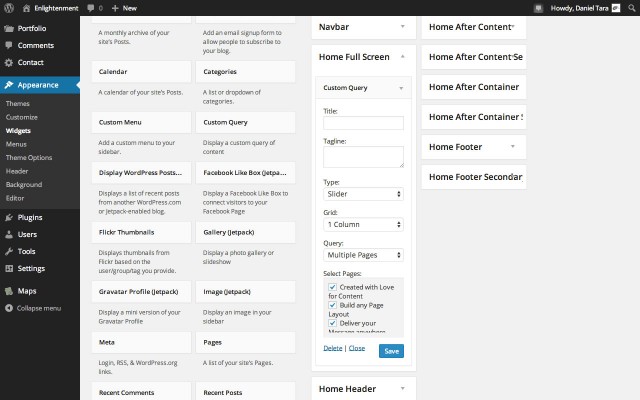
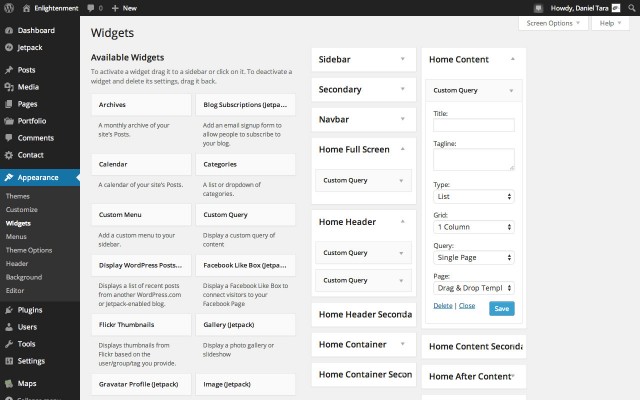
After the pages have been published go to Appearance → Widgets and in the “Home Full Screen” Sidebar drag a Custom Query Widget. Under “Type” select “Slider” and under “Query” select “Multiple Pages”. Then, under “Select Pages”, check the boxes for the pages you have just created:
Now if you preview your home page you should see the slider:
Adding multicolumn Media Components
Bootstrap’s Media Components are content blocks with a headline and image floated to the left. You can observe 3 such components on the home page under the slider.
Creating Content Pages
For the media components we will create 4 pages, the first containing the headline and description of and the other 3 the media components themselves.
First create a page with just a headline styled as “Heading 3” and a paragraph, both aligned to the center:
Then create 3 pages that contain the media components:
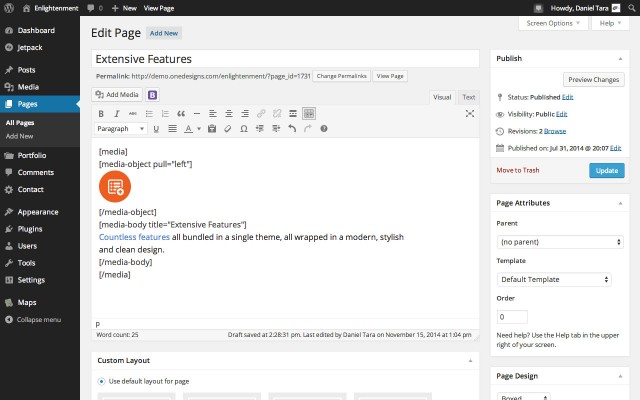
As you can see, media components need to be wrapped in the [media] shortcode. The image is wrapped in the [media-object] shortcode and the pull="left" instructs that the object will be floated to the left. You don’t need to align the image itself to the left. The content is wrapped in the [media-body] shortcode and the title="…" attribute denotes the content’s headline. You don’t need to add any heading inside the content.
Adding the Custom Query Widgets
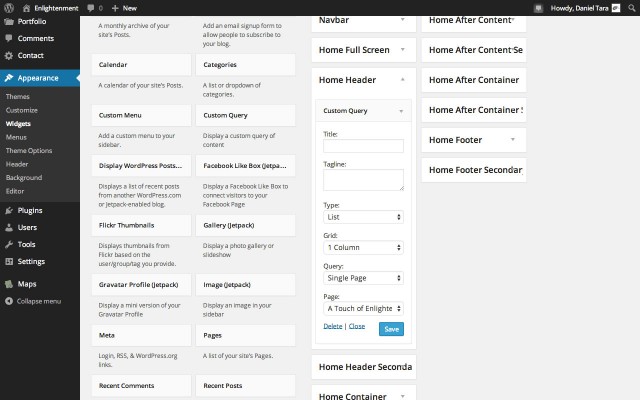
The widgets for these components will be added in the “Home Header” sidebar. First drag a Custom Query widget for the headline and description. Under “Query” select “Single Page” and under “Page” select the title of the page you have created:
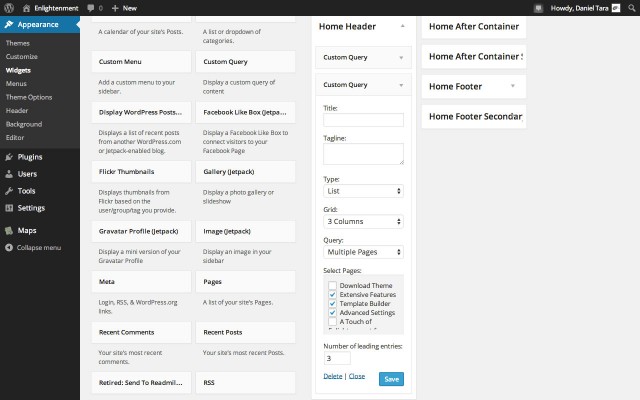
Afterwards drag another Custom Query Widget into the same sidebar for the media components. Under “Grid” select “3 Columns”, under “Query” select “Multiple Pages” and check your pages containing the media components; then finally under “Number of leading entries” select “3”:
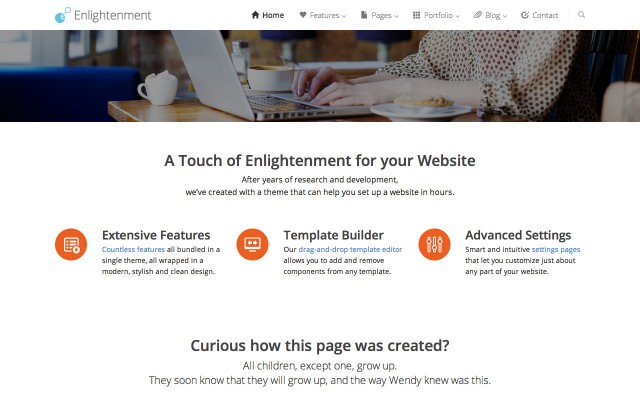
Now you should be able to see the media components on the home page under the slider:
Adding the “Download Now” Call to Action
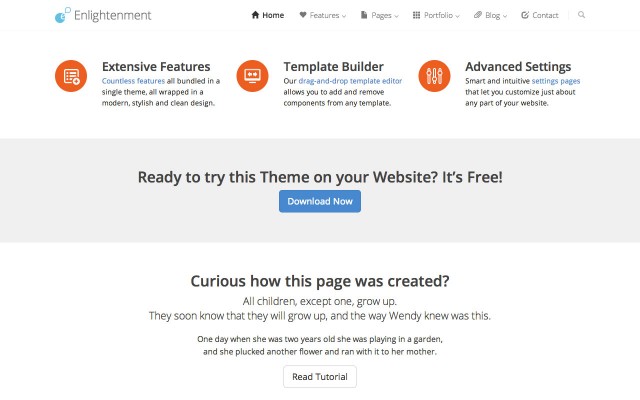
The “Download Now” Call to Action is added to the “Secondary Header” sidebar which by default on pages with the “Full Screen” design displays on a light-gray background.
Creating Content Page
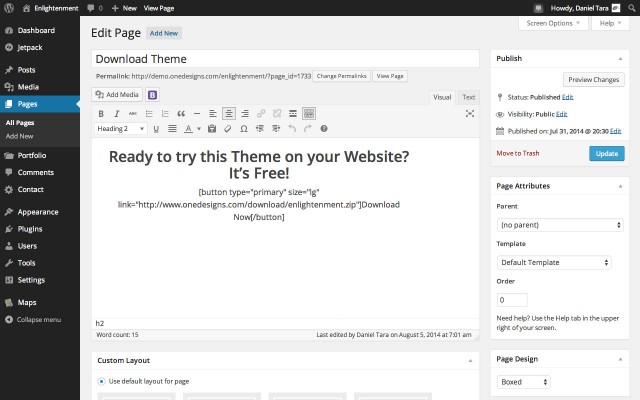
The content page for this call to action contains simply a headline and button:
The headline is styled as “Heading 3” and the button is added with the Bootstrap Shortcodes plugin, both aligned to center in the editor.
Adding the Custom Query Widget
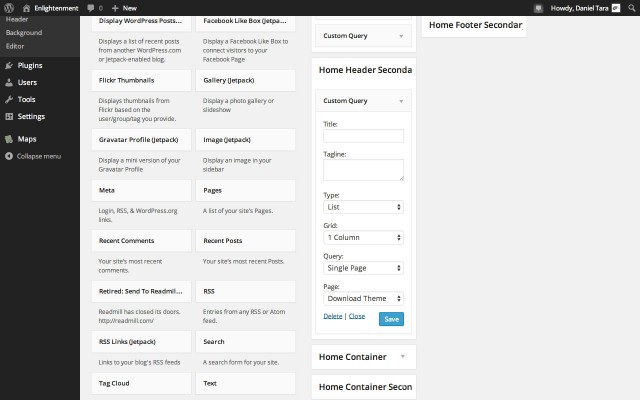
Drag a Custom Query Widget to the “Home Secondary Header” sidebar. Under “Query” select “Single Page” and under “Page” select the page you’ve just created:
After you save the widget’s settings you can preview the call to action on the home page:
Adding multicolumn Portfolio Projects
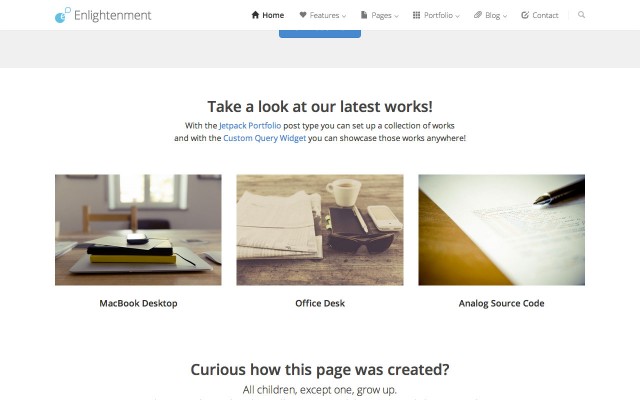
Since the Custom Query Widget supports querying any post type, we can present a preview of our latest projects added with the Jetpack Portfolio post type.
For this section we will need to create only one page with the headline and description similar to the step above and insert it through a Custom Query Widget in the “Home Main” Sidebar. We won’t repeat the process since it’s identical to the example we’ve already covered. Note that you can also add a title and description directly in the Custom Query Widget but you can’t customize its font size or text alignment.
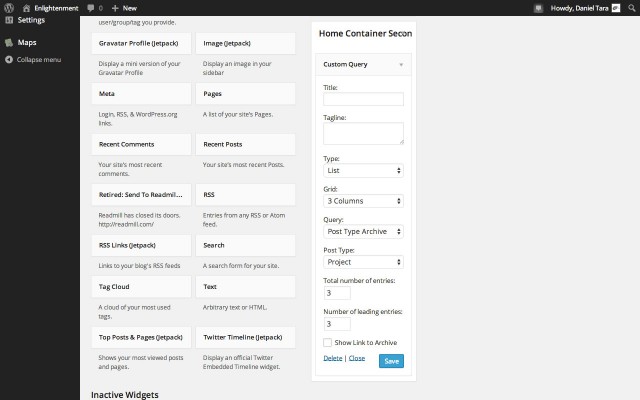
After adding the widget for the headline and description, add another Custom Query Widget to the “Home Main Secondary” sidebar. Under “Grid” select “3 Columns”, under “Post Type” select “Project” and under both “Total number of entries” and “Number of leading entries” select “3”:
On the home page you should see your latest 3 portfolio works:
Adding Content with Full Width Image
Adding a full width image to the page’s content is useful if you want to showcase something that requires attention to detail like a software screenshot. In the “Full Width” layout you can add an image of maximum 1060 pixels wide:
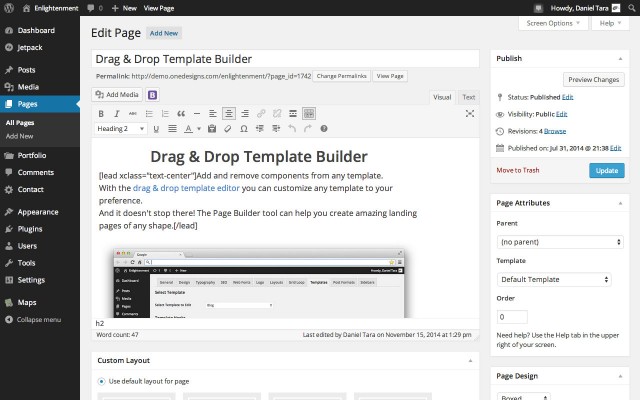
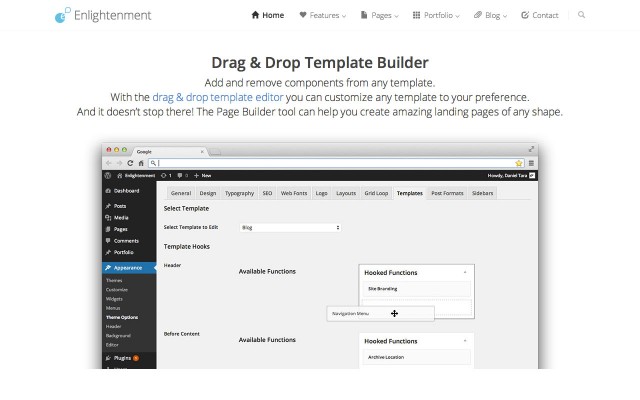
In our example we have added a screenshot of the theme’s drag-and-drop template editor which we hope you agree is one of the theme’s greatest features. The page was added as a single page query to the “Home Content” sidebar:
And here’s the result on the home page:
Adding In-Page multicolumn Content
Sometimes it’s more convenient to split a page’s content into multiple columns instead of relying on the sidebars’ and widgets’ integration with the grid system. This can be done with the Bootstrap Shortcodes plugin [row] and [column] shortcodes:
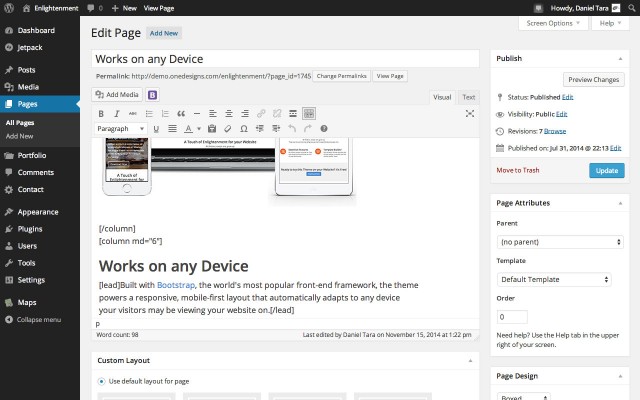
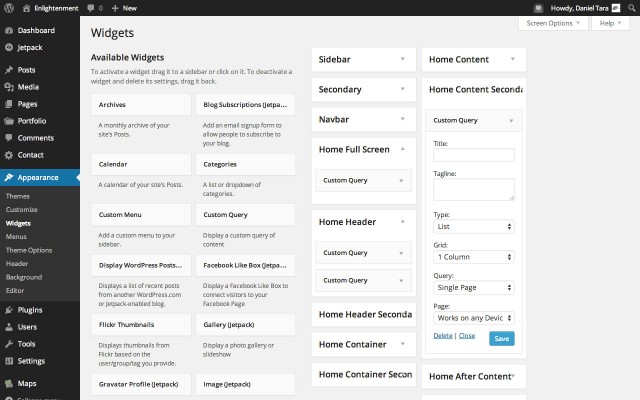
In our example we have wrapped the image in 6 columns and the rest of the content in another 6 columns. Then we have added this page as a single page query to the “Home Secondary Content” sidebar:
This is how it renders on the home page:
Hang on, we’re already half through the process!
Adding Image Galleries
For the image gallery section we have configured the “Home After Content” sidebar to display in 2 columns. While the Custom Query Widget can display in multiple columns it does not display multiple types of content and this is where the sidebars’ integration with the grid system comes in handy.
For the left column we have created a page with a headline and description:
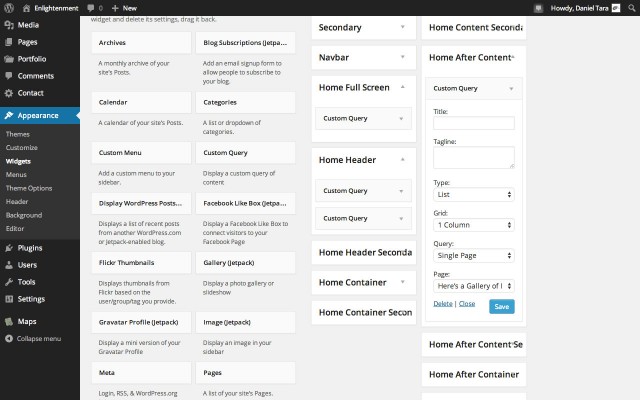
Then we have added it to the “Home After Content” sidebar as a single page query:
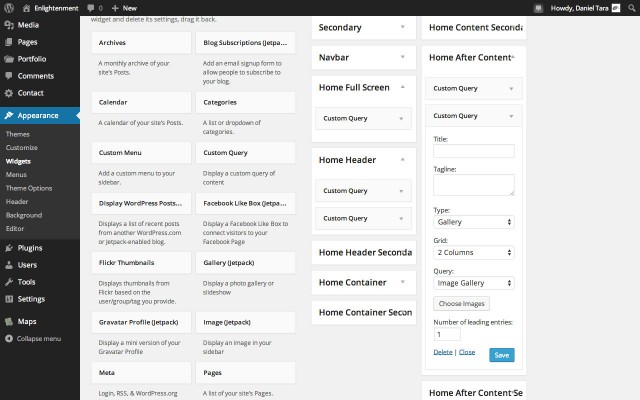
For the image gallery drag a new Custom Query Widget to the “Home After Content” sidebar. Under “Type” select “Gallery”, under “Grid” select “2 Columns”, Under “Query” select “Image Gallery” and under “Number of leading entries” select “1”:
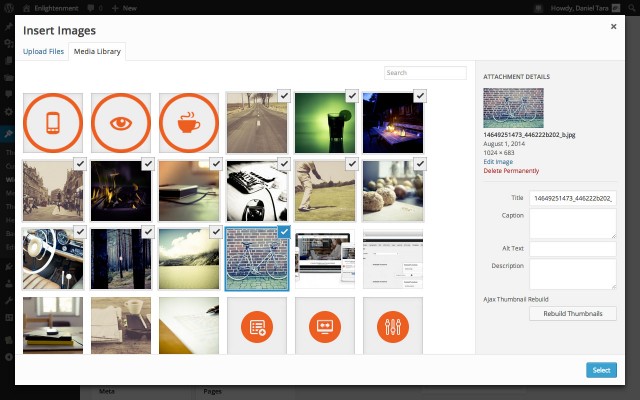
By clicking on “Choose Images” you can select the images for the gallery directly from the Media Library. Multiple images can be selected by holding down the Ctrl key on Windows or Cmd key on Mac:
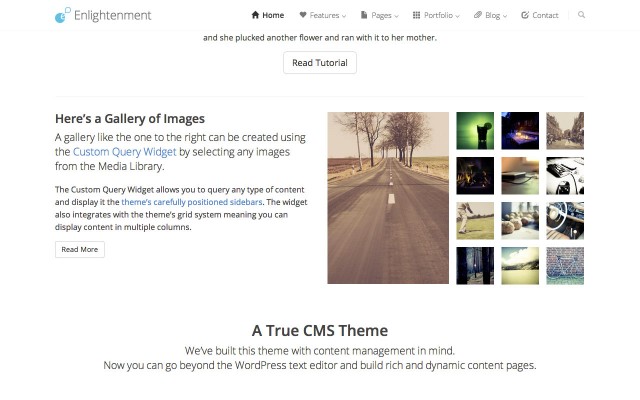
One the home page you’ll see the gallery of images with the leading post in a single column followed by thumbnails of the other images:
Adding multicolumn Rich Content
Sometimes it’s more convenient to style content just with the text editor without messing with shortcodes or other plugin-generated content. To your amazement, the 4 columns of content, each with an image, headline and description, were created just with the text editor and added via the Custom Query Widget on 4 columns.
This is how the page content of such a component looks like:
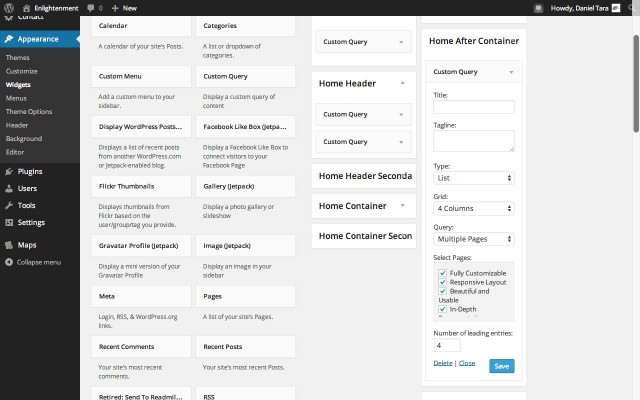
Theme components were added to the home page as a query of multiple pages in 4 columns in the “Home After Container Sidebar”:
On the home page they render as 4 columns components of rich content:
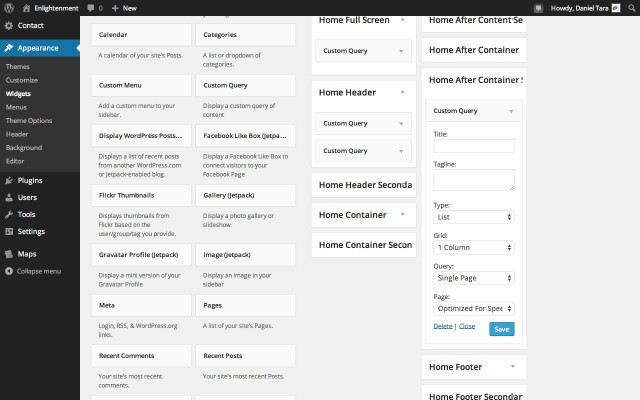
Otherwise, if you want to style content on multiple columns in a single page, remember you can do so with the Bootstrap Shortcodes plugin. The symmetrically aligned pieces of text from the home page is such an example:
In the page above the content was split in 2 columns and the first part aligned to the right in the editor. The page was added to the “Home Secondary After Container” sidebar as a Custom Query Widget of a single page:
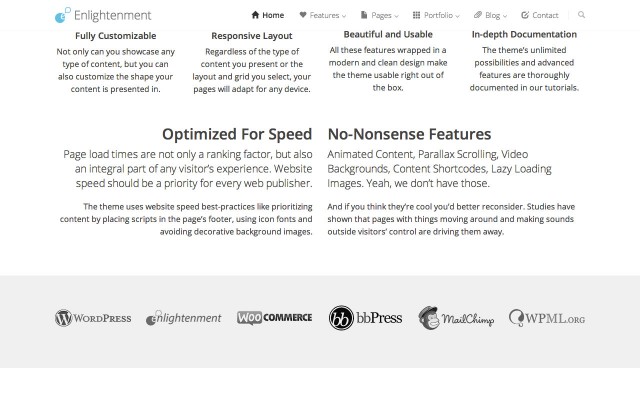
On the home page the content renders in 2 columns:
Adding an Image Carousel
The image carousel was added to the “Footer” sidebar that, like the “Secondary Header” sidebar, displays on a light-gray background in pages with the “Full Screen” design.
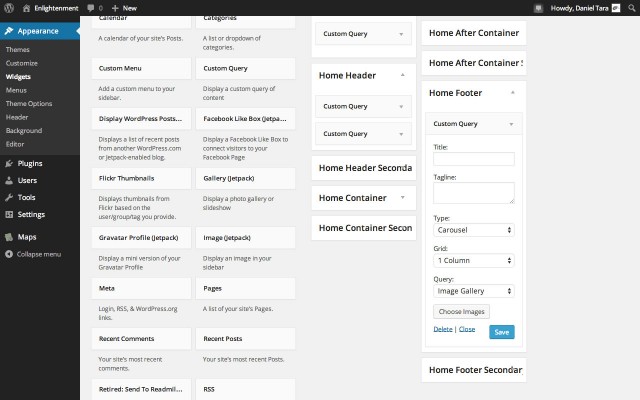
To add an image carousel, drag a Custom Query Widget to the “Home Footer” sidebar. Under “Type” select carousel and under “Query” select “Image Gallery” then select your images from the Media Library by clicking on “Choose Images”:
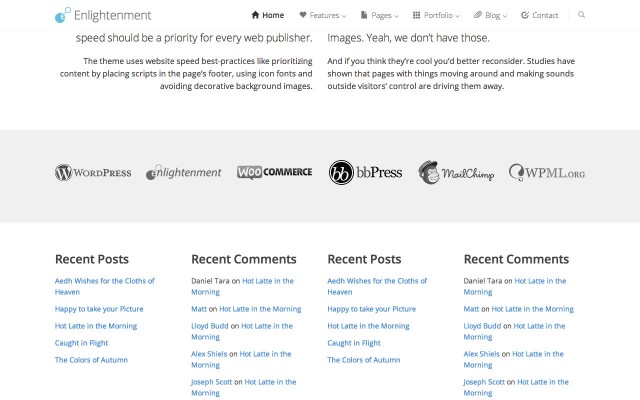
This is how is displays on the home page:
Adding other Widgets to Sidebars
The theme’s templates weren’t widgetized only to support the Custom Query Widget but to extend the theme’s ability to support content generated by any plugin. You should be able to use widgets of any type in the theme’s sidebars and if they’re properly coded should also render correctly.
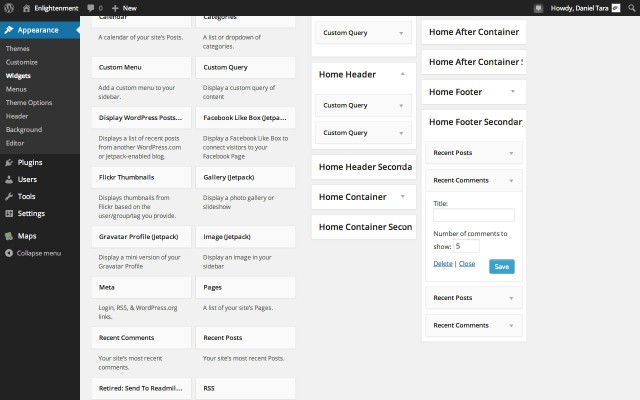
In the “Home Secondary Footer” sidebar we have 4 widgets that come bundled with WordPress:
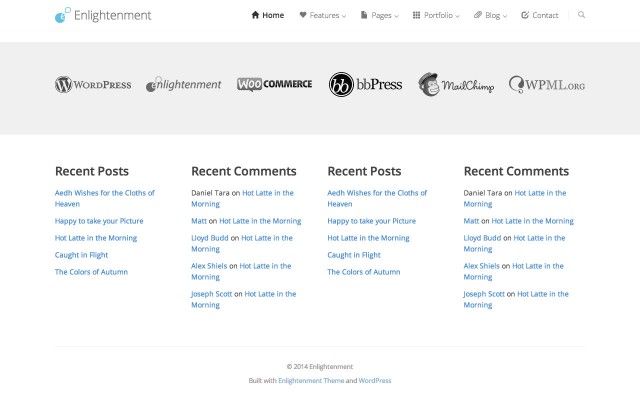
On the home page they render in 4 columns as lists of items:
Setting the Static Front Page
At this point we have completed the creation of our home page and, if until yet we have just saved the page as draft, now it safe to publish it.
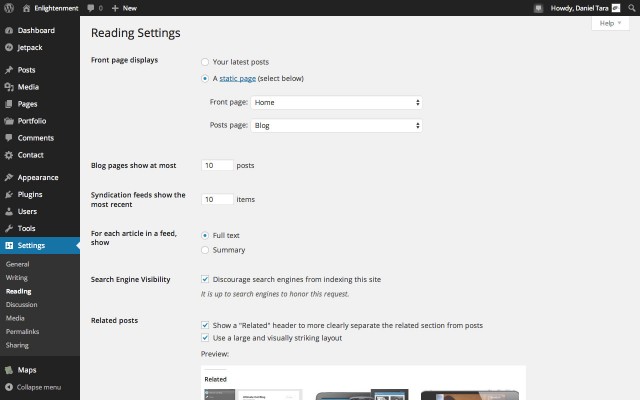
To use this page as home page it’s not enough to publish it, you must set it as static front page. To do so, go to Pages → Add New and create a new page called “Blog”. Don’t add any content to this page as it will be used to display the blog posts instead. Then, go to Settings → Reading and under “Front page displays” select “A static page” and set the “Front page” to the page we have created in this tutorial and as “Posts page” the blog page you have just created:
Wrapping Up
This was the verbatim deconstruction of what we considered was a rich landing page that can properly demonstrate what kind of pages can be created with Enlightenment Theme. If you feel this was long not as simple as you expected we encourage you to give it a chance. Once you’ve mastered the way the theme’s tools work, creating amazing pages will become simple and intuitive.
And by all means, don’t stop here! If we wanted to limit the theme’s ability to creation of such pages we would have made a static template. We have created this level of flexibility to encourage you to create your own unique and amazing landing pages. Use the knowledge you have gained from this tutorial to create the pages you need to make your website stand out and let of know of your results, we’d love to hear what you’ve come up with using our theme!
Don’t forget to read our other tutorials that cover Enlightenment Theme’s Documentation. Remember Enlightenment is an advanced and very flexible theme that allows you to create amazing layouts and showcase any type of content in multiple ways, you don’t want to miss out on what pages you can create with this theme!

Dear Developers,
thank you very much for this amazing theme, its a great joy to work with it. However, I have stuck a bit with it. I’m trying to keep my actions aligned with the wording of the tutorial but after creating the basic pages for the slider, added the widget to the sidebar, it doesn’t show up when I save the page to see how it looks like, only the content of the Home page is visible.
I tried to set everything up as it was written, the only difference has been that I’m not paying attention to the content yet, so I put in dummy text for the moment. I have enabled the qtranslate plus plugin to see if it works well together.
I find it a tough to bypass the problem so if there is a frequent mistake, I’d appreciate some feedback. 🙂
Thanks a lot!
Kind regards,
Viktor
One little addition: there seems to be something wrong with the widget because I tried to add the Meta widget as well and it doesn’t show up either.
Hello Viktor,
You probably didn’t assign the sidebar to the corresponding location as outlined in the tutorial under “Assigning Dynamic Sidebars to Sidebar Locations”.
Dear Daniel,
Many thanks, you were right, I made a mistake with the assignments, an entry remained unsigned in the long list.
Thanks a lot for the support and for the great work!
Kind regards,
Viktor
Thank you for this beautiful and very customisable template…
I’ve been able to make a great school portfolio with your template.
Keep up the good works
Enlightenment Theme is a modern, flexible and multipurpose WordPress theme. This one of the best theme which I have seen. Some of my favorite features of this theme are : free of cost, easily customize, tweak and speed up your website’s development process.
Thank you for your kind words Amy. We’d love to see how you put it to work for you.
I am having the same problem as Viktor – caveat I don’t want to use all the dynamic location so I assigned the first three and I cannot save the location on the page, I also have to disable the use default location every time after page save.
Any help will appreciated.
-Thanks
Usually when this happens there’s a plugin tampering with user permissions, usually those that fall in the event calendar or directory management category. Try disabling your plugins one-by-one and see which of them is causing it.
I have been using this theme as kind of a boiler plate or foundation on which to build WordPress sites from scratch. I have been able to create a whole range of different sites from general blogs to ecommerce and business sites.
I just wanted to say a quick thank you for creating Enlightenment it truly has simplified and sped up my WordPress work.
Thank you.
Thank you for your appreciation. This is the exact purpose Enlightenment theme was created for. I’d love to see your work so please send me some links.
Hi Daniel,
Congratulations for your work for this theme, I love it! And thank you for this tutorial because without it I was a little lost and it shows how to use sidebars for everything with custom_query widget. I’m playing with it right now to see if I can use for a customer. I have some questions :
– the fact to use a lot of sidebars, is it a problem for ressources used to display the pages?
– if I want to customize 10 pages each with all the sidebars I will have 100 sidebars in the sidebars management pages, is there a possible problem of ressource? Like WordPress has problem with the menu manager when there are a lot of pages. Do you plan to make the sidebars management page easier to manage a lot of sidebars?
So my main interrogation is about all theses sidebars, the ressources it uses and the management of theses sidebars. Do you make some tests about the ressources used by your theme? What do you think about that.
Martin G
Yes, there are performance issues when adding many sidebars but they only occur in the admin, not on the front-end. I agree that a more user friendly solution is required but don’t have any ideas. If you have any suggestions I’d love to hear them.